Welcome to the world of crafting custom 3D printed creations from SVG artwork! In this guide, we’ll explore the exciting process of transforming digital vector designs into tangible objects using the power of 3D printing technology. From selecting and refining SVG artwork to preparing and printing the final product, join us on this creative journey as we unlock the potential of combining digital artistry with innovative manufacturing techniques. Whether you’re a seasoned designer or a curious hobbyist, this guide will equip you with the knowledge and tools needed to bring your unique creations to life in the form of custom 3D printed masterpieces.
Contents
3D Printed from SVG Artwork
Design or Obtain the SVG File
You can either design your own SVG file using vector graphics software like Adobe Illustrator, Inkscape, or similar tools, or you can find SVG files online on websites like Thingiverse, Cults3D, or YouMagine.
Convert SVG to 3D Model
SVG files are 2D vector graphics, so to create a 3D printed item, you’ll need to convert the SVG file into a 3D model. You can do this using various software tools, such as Tinkercad, Blender, Fusion 360, or FreeCAD. Some of these tools have built-in functionalities for importing SVG files and extruding them into 3D shapes.
Prepare the 3D Model
Once you have converted the SVG file into a 3D model, you may need to make adjustments to ensure it is suitable for 3D printing. This may involve tasks such as resizing the model, adding supports, or making modifications to enhance its printability.
Slice the Model
Use slicing software such as Cura, PrusaSlicer, or Simplify3D to prepare the 3D model for printing. Slicing software converts the 3D model into a series of 2D layers and generates the G-code instructions that tell the 3D printer how to create each layer.
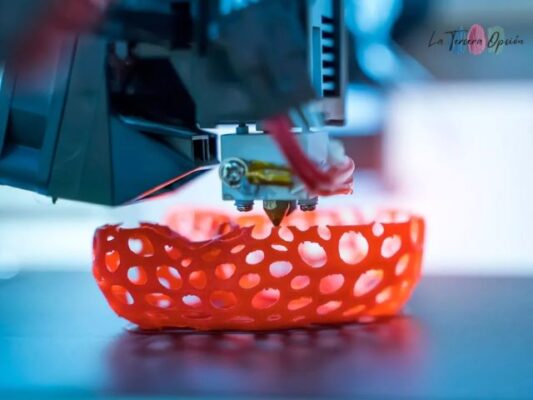
3D Print the Model
Load the sliced G-code file into your 3D printer’s software (or directly onto the printer if it has an onboard interface), and start the printing process. Make sure to use the appropriate settings for your 3D printer and the chosen filament material.

Post-Processing (Optional)
After the printing is complete, you may need to perform post-processing steps such as removing support structures, sanding, painting, or applying other finishing touches to achieve the desired appearance and quality for your 3D printed item.
Conclusion
In summary, crafting custom 3D printed creations from SVG artwork offers a unique avenue for creative expression and innovation. With the advancement of technology and the accessibility of 3D printing, individuals can explore endless possibilities in bringing their digital designs to life. So, embrace the opportunity to unleash your creativity and turn your imagination into tangible reality through this exciting process.
Related Post
Express Your Passion: 7 Anime Room Decor Ideas to Showcase Your Style
Top 10 Photoshop Portraits Actions Popular